She’s Crafty: DYI Grown-Up Night Light
- Chickster

- Nov 30, 2011
- 2 min read
Updated: Sep 5, 2018
By Shelby


Embarrassing confession: I’m afraid of the dark. And almost 30 years old, which makes a kiddie night light out of the question. For a grown-up solution to my childhood fear, I wanted to employ one of my favorite things in the world, Christmas/twinkle/fairy lights. I came across the perfect solution via an image on Pinterest (which I have only discovered recently, many, many moons after the rest of the Internet). Look at the loveliness:
Once I found that image, I searched until I found the tutorial for creating it, which ultimately came from Apartment Therapy. And then, it was off to Hobby Lobby. For less than $15, I picked up a 16 × 20 blank canvas and a package of 100 white Christmas lights (with white light casing and wire too for maximum camouflage). For an extra $10, I picked up a plug-in dimmer to have more control over the brightness of the lights.
Following the Apartment Therapy tutorial, I started by sketching out some dots with a pencil on the reverse side of the canvas. I loved the three-cluster design of the original image, so I tried to copy that. Once I got in there with the lights though, I realized that sketching out the design ends up being pretty fruitless, since you have to yield placement to however much distance there is between each light. The tutorial suggested poking through the canvas (which is surprisingly tough) with an awl. Since I didn’t have one of those, I used a small screwdriver instead to make the beginnings of the hole. Then it came down to simply jamming the individual light through that hole you started. And then doing it over and over again to create 100 holes filled with 100 lights. The tutorial also recommended securing each light with craft glue, but I didn’t have that and am impatient so I just left it. By criss-crossing the light strand and placing each light at maximum distance from the next one, I was able to make it pretty secure from behind.
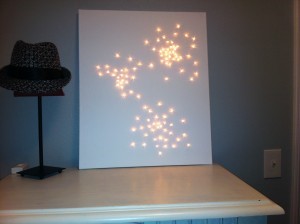
So when all 100 lights were done, this is what it looked like (top left).
Kind of boring/ugly, but when I plugged in the lights, it began to get pretty (top middle).
And prettier (top right).
And really pretty (bottom left).
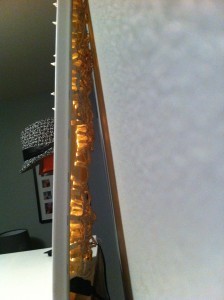
I love the way each light throws such pretty shadows against the canvas. I suggest setting the canvas on a dresser or table that will camouflage the electrical cord trailing down from the bottom that needs to be plugged in and also provide enough space for the wiring behind the canvas. A side view of what mine looks like on the reverse side (not too messy, but not pretty either) is on the bottom right.
Apartment Therapy also suggested painting the canvas first, which could be a nice way to avoid the boring white daytime look. Maybe try a pretty blush color or a nice deep blue to look like stars on a night sky.


Comments